

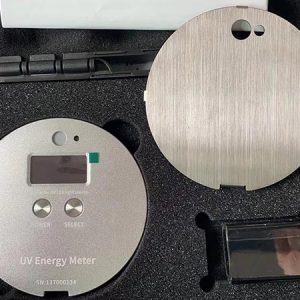


1. Product Introduction
UV energy meter can measure UV energy, UV intensity and temperature at the same time. It is suitable for UV energy, UV intensity and temperature detection of UV curing machines, UV dryers, mobile phone UV coating machines, exposure machines, printing machines and other equipment. This meter is suitable for measuring the UV intensity and UV energy of UV LED light sources.
2. Parameters
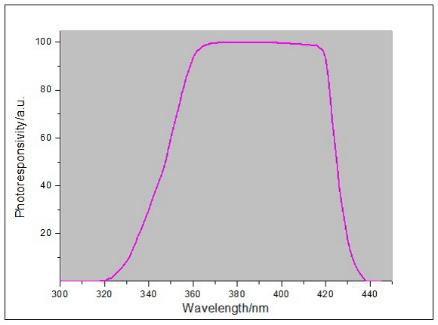
- Spectralrange: 340nm ~ 420nm, calibrated at 395nm
- Irradiancemeasuring range: 0 ~ 40000mW/cm2
- Irradianceresolution: 1mW/cm2
- Energymeasuring range: 0 ~ 999999mJ/cm2
- Energymeasuring accuracy: ±10%, ±5% (typical)
- Samplingspeed: 2048 times/second
- Recordingperiod: 32 minutes
- Temperaturemeasuring range: -55°C ~ +125°C
- Powersupply: Rechargeable lithium batteries 7V@400mAh
- Display:128*64 Dot matrix OLED
- Dimension:Diameter 102mm * thickness 6 mm
- Weight:136g
3. Spectral response curve
 4.Characteristics
- Adoptultra-small size design, the thickness is 6mm and the width is 44mm.
- High-precisionand quick-response temperature detector, dynamically measuring the actual temperature in the UV curing machine.
- Built-intimer, the meter can accurately record and display the UV curing
- Metal shell, high temperature resistant design, the meter can run in an environment of 100℃for a long time.
- Thestored data will not be lost when the power is off and the last test data will be displayed automatically after power on.
- Themeter provide two standard data, users can use Chinese national
5. Operation
1. Parameter setting
In OFF mode, long press the “POWER” button for 3s and enter the parameter setting mode:
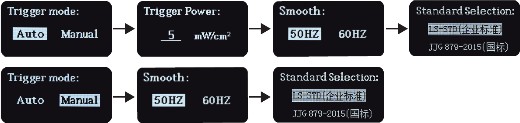
A.Trigger mode: Auto/Manual
Short press the “SELECT” button and select Auto/Manual
Select Auto, the automatic trigger mode, when the power value is greater than the selected trigger value, the measurement is automatically started.
Select Manual, short press the “POWER” button start a measurement and end a measurement.
Short press the “POWER” button to confirm and start another setting. Choose “Auto”, the meter enters the trigger power value setting interface; Select Manual, the meter enters the smooth setting interface.
Note: For the recording time is only 32 minutes, if the production line is very long and need a long time to reach the UV Lamp position, the “AUTO” mode must be selected.
B. Trigger power: 0.1-5.0mW/cm² can be set
Short press the “SELECT” button to set the trigger power value and you can long press the button for quick setting.
Short press the “POWER” button to confirm the setting and the meter enters the smooth interface.
C. Smooth: 50HZ/60HZ
If the UV light source uses AC power supply, the frequency of the AC power will affect the accuracy of the power measurement. Short press the “SELECT” button to select the power frequency of the light source (select 50HZ for DC power supply).
-
-
- 50HZ:50HZ
- 60HZ:60HZ
-
Short press the “POWER” button to confirm the setting and enter the “STOP” interface.
D. Standard Selection
Short press the “POWER” button to select the standard.
LS-STD (Enterprise standard ): The meter is calibrated according to Enterprise standard
JJG 879-2015 (Chinese national standard): The meter is calibrated according to Chinese national standard.
Short press the “POWER” button to confirm the setting, the meter enters the “STOP” interface.
E.Factorydefault settings:
1).Trigger mode: Manual Smooth: 50HZ
Standard Selection: LS-STD (Enterprise standard)
2). ON/OFF
-
-
- InPOWER OFF state, short press “POWER” button to power on the After turning on the meter, the meter displays the calibration coefficient, version number, serial number, etc. and then enters the last measurement interface (STOP interface). As shown below:
-
In the “STOP” interface, long press the “POWER” button to power off the meter.
-
-
- Inthe “STOP” interface, the meter will automatically power off in 3 minutes without any
- In the automatic trigger measurement “Ready” state, the longest waiting time is 50 minutes. If the measurement cannot be triggered within 50 minutes, it will automatically turn off.
-
3). Measurement
In the measurement mode, three operation states exist:
READY: Ready state; in the auto trigger mode, this means the meter is waiting for triggering to begin a measurement.
RUN: Measuring state; this means the meter is measuring data.
STOP: Measurement is over.
In measurement interface:
M: Manual measurement mode
A: Auto measurement mode
-
-
- Manualmeasurement mode: in the STOP Short press the “POWER” button and then short press the “SELECT” button to confirm the new measurement, clear the historical data (display ” “),
-
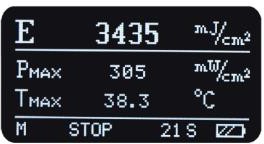
automatically enter the measurement interface (RUN state) after 1s. The interface dynamically displays energy E, real-time power value P, real-time temperature value T, measurement time. Short press the “POWER” button or after 32 minutes, the measurement is over and enter the STOP interface. The interface displays the measurement result energy E, maximum power value PMAX, maximum temperature value TMAX and measurement time.

-
-
- Automatic mode: After pressing the button to confirm the new measurement, the meter enter the READYstate to clear the historical data and wait for the trigger condition (Trigger power) to be met, the energy display ” ” and When the power value is greater than the set trigger power, the
-
trigger condition is met, enter the measurement interface (RUN state). The interface dynamically displays energy E, real-time power value P, real-time temperature value T and measurement time. When the recording time reaches 32 minutes or the power value is less than the set trigger power, the measurement is automatically ended and enters the STOP interface. The interface displays the measurement result energy E, maximum power value PMAX, maximum temperature value TMAX and measurement time.

In the stop status, long press the “SELECT” key to clear the current test data.
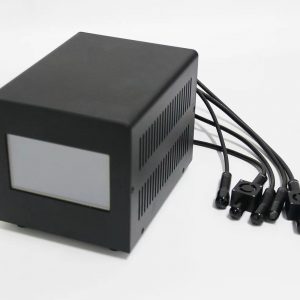
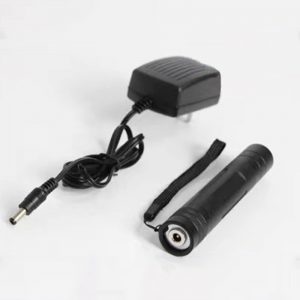
4). Charging
This meter has a built-in lithium rechargeable battery. Please charge it in time when the battery symbol on the screen is empty during use. After plugging in the charger, the energy bar in the battery symbol increases, indicating that it is charging. Charging can be done in the following ways:
-
-
- Usean USB data cable, plug it directly into the USB port of the
- Usethe matching 5V switching power
- Themobile power supply for smart
-
6. Measurement and Notes
- Thesensor must face the UV light
- Whennot in use, please long press the “POWER” button turn off the
- Avoidcontact with corrosive materials and keep away from high
- Pleaseput it in the specialized package after power-off and keep
- The suggested calibrating period is one year and our company has the standard light source and provides calibration service. (The previous calibration time “Calibration: year/month/day” will be displayed on the boot screen.)
- Forthe UV sensor is very sensitive to humidity, the storage environment is very For a long time storage, please be sure to keep the meter in dry environment.
7. Heat Shield
Equipped with heat shield to avoid damage to the screen caused by high-power UV lamps irradiating the instrument at close range.
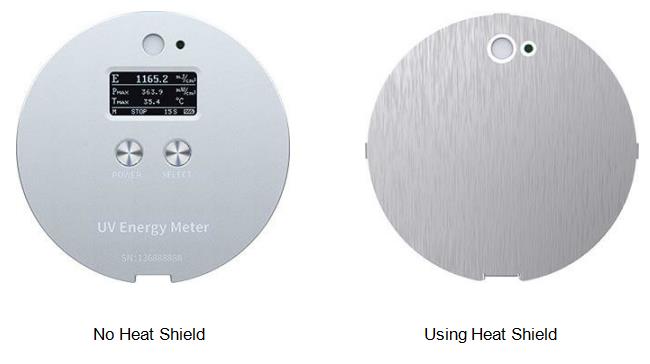
No Heat Shield Using Heat Shield
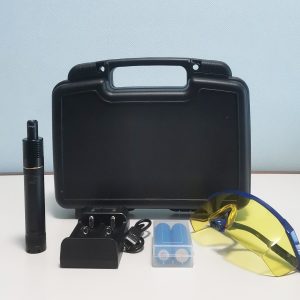
8. Packing details
| No. | Description | Quantity | Unit |
| 1 | UV Energy Meter | 1 | pcs |
| 2 | USB data cable | 1 | pcs |
| 3 | DC 5V Power adapter | 4 | pcs |
| 4 | User Manual | 1 | pcs |
| 5 | Certificate/Warranty card | 1 | pcs |
| 6 | Plastic Case | 1 | pcs |
| 7 | Heat Shield | 1 | pcs |
9.Service
- Themeter has one-year If the meter works abnormally, please send the whole meter to the company for maintenance.
- Provideusers with spare parts and lifelong maintenance
- Providethe users with the meter inspection service for
- Freetechnical support for long

Reviews
There are no reviews yet.